Google Search Console is the best single source of information on how to improve your performance in Google search (and other search engines) It’s a free tool offered by Google, available to anyone with a gmail address and a website. Creating your account is the first step in learning how to get more website visitors from search engines.
To gain access to the account for your website, you need to prove to Google that you control your website. This requires a bit of technical knowledge: either the ability to edit a DNS entry for your website, or the ability to add or edit HTML files on your website. If those tasks are a complete mystery, share this post with the technical person who helps you manager your site. The entire process should take about 15-20 minutes to complete.
Here are the steps to gain access to the Google Search Console profile for your website.
1. Log in to search.google.com/search-console
Go to https://search.google.com/search-console and click ‘Start Now’
Log in with a google (gmail) account that you access regularly.

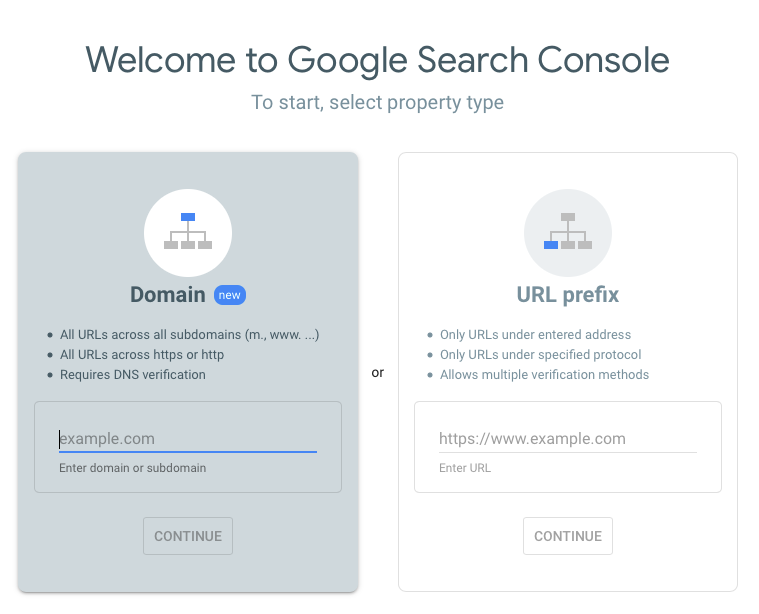
2. Can you edit your DNS entry? (or is this question gibberish to you?)
Once you have logged in you will be asked to choose a ‘property type’: either ‘Domain‘ or ‘URL Prefix‘ (see below)
The type you choose depends on your answer to this question: Can I or someone on my team log in to the domain name provider for our website and add a TXT record?
If you answer ‘Yes‘, choose ‘Domain‘.
If you don’t know the answer (and the technical person who manages your website doesn’t either) choose ‘URL prefix‘.
3. Choose a verification method
When you choose a property type, Google provides you with unique codes that will prove you control the website URL, and thus should be granted access to Google Search Console data for that domain.
Your next step is to place those codes in a spot where Google can read them and verify your account access.
Your options are:
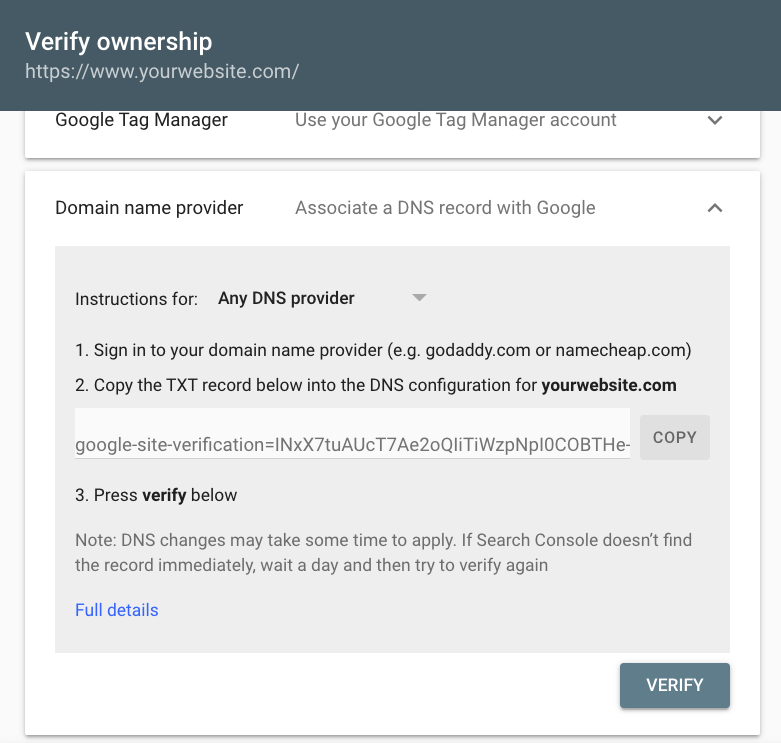
- Add a TXT entry to your DNS record
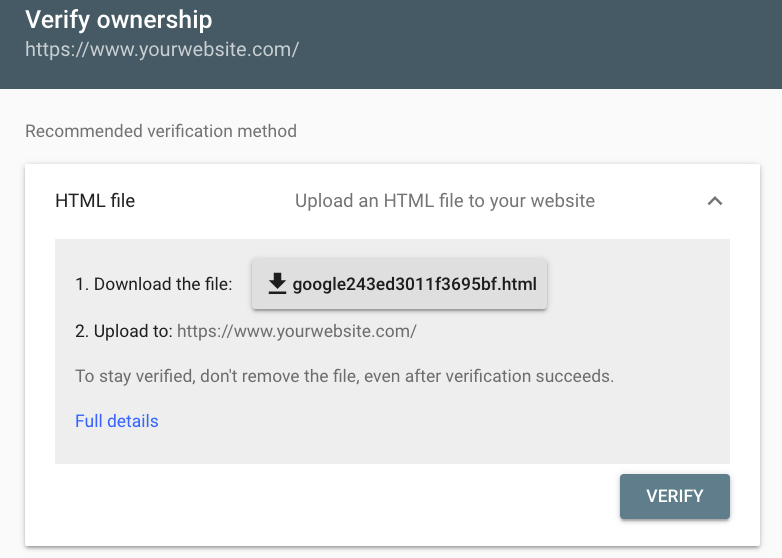
- Upload an HTML file to your website
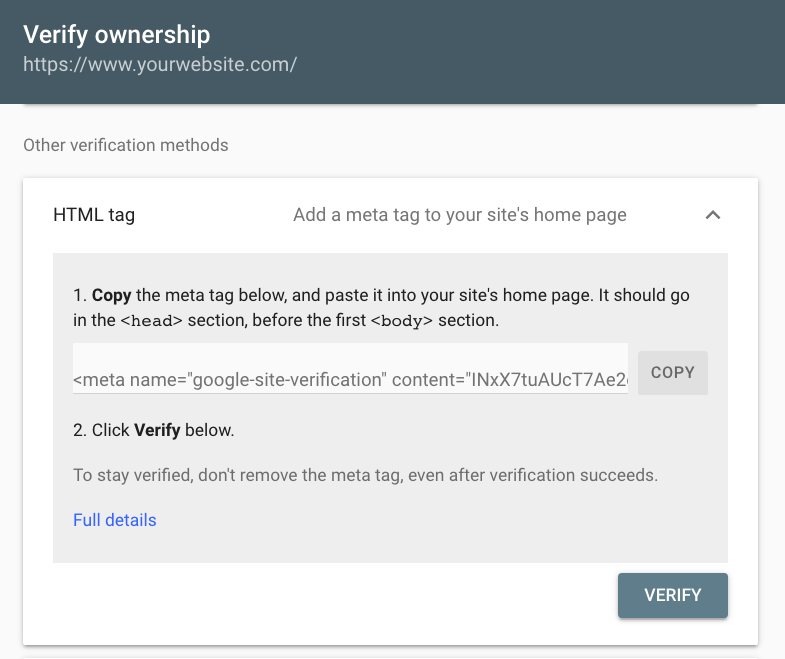
- Edit the HTML on your home page, adding a <meta> tag
- Use Google Analytics or Google Tag Manager to verify ownership of the site.
3a. Add a TXT entry to your DNS record
With this method you log in to the account (with godaddy, easydns, etc.) that manages your domain name (ie. yourwebsite.com) and add a unique TXT record to the profile. NOTE that editing your DNS entry carries some risks so it’s best to understand what you are doing.
3b. Post an HTML file to your website
Google Search Console will provide you with the HTML file to download and then upload to the root directory of your website, the same that holds your main home page.
3c. Edit the HTML of your website home page, adding a unique <meta> tag.
This method involves adding some (harmless) code to the HTML of your main website page. This is a unique <meta> tag that Google Search Console provides you, added to the front page of your site.
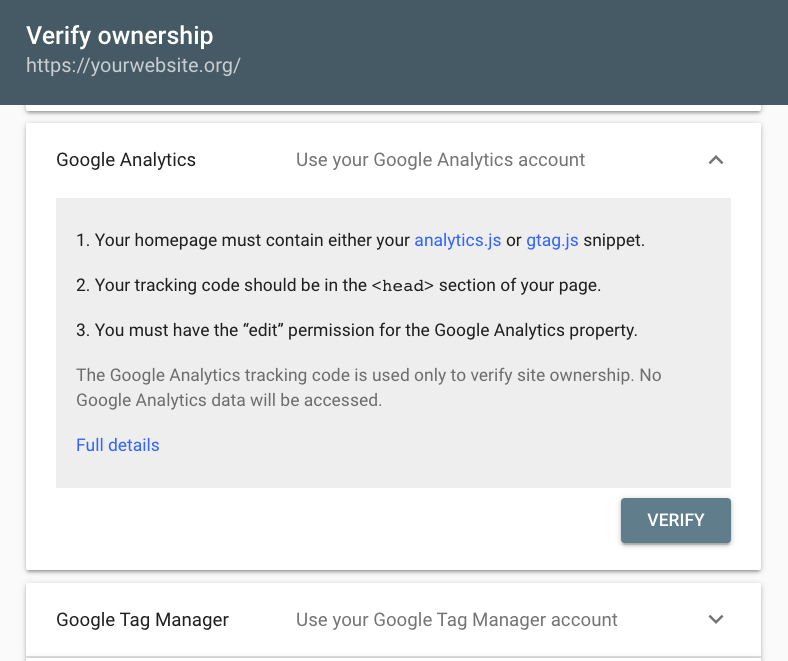
3d. Google Analytics or Tag Manager (with the URL Prefix method)
With the URL Prefix method, Google offers the option of using Google Analytics or Google Tag Manager to verify that you ‘own’ the website in question. The advantage here is that it takes one click to verify, granting you almost instant access if you have administrator privileges on the Google Analytics or Tag Manager accounts on your website. The disadvantage is that this verification method almost never works – in my experience about %5 of the time I am granted access despite having admin privileges on both platforms.
4. Log in to your Search Console account and enjoy!
Use one of the verification methods above to prove you have website ownership. Don’t be concerned if the verification method you choose takes several days to complete. Google Search Console will retain the information and the next time you log in to https://search.google.com/search-console you should be able to see the website properties you have added in the top right of the account, and click a button to verify the site.